Introduction
MCP Guardian manages your LLM assistant's access to MCP servers, handing you realtime control of your LLM's activity.
📜 Message Logging - See traces for all of an LLM's MCP server activity
💂 Message Approvals - Approve and deny individual tool call messages in real time
🤖 Automated Message Scans - Realtime automated checks for safety, privacy, etc (Coming Soon)
MCP Guardian also makes it a breeze to manage multiple MCP server configurations. Quickly switch between server collections without having to manually manage configuration files for your MCP host applications.
MCP Guardian leverages Model Context Protocol, an open protocol for communication between LLM applications and external data/tool providers. Claude Desktop as well as many useful MCP servers currently support the protocol.
Because MCP is an open specification, MCP Guardian doesn't need to be deeply integrated in an LLM's host application to manage its activity. It simply proxies MCP traffic from an existing host (like Claude Desktop) to provide visibility and granular control of the LLM's activity.
Installing
MCP Guardian can be installed directly from Github releases. Go to the section for your operating system for detailed instructions.
MCP Guardian can also be built from source. Check the README for build instructions.
Installing - Linux
This page explains how to install MCP Guardian on Linux using prebuilt binaries from Github Releases.
[1] Install mcp-guardian
Download
mcp-guardian_x86_64-linux.AppImage
or
mcp-guardian_x86_64-linux
The AppImage is much easier to use, but if you know how to get dependencies installed properly the native binary is provided as another option.
Rename the binary and make it executible:
mv mcp-guardian_x86_64-linux.AppImage mcp-guardian.AppImage
chmod +x mcp-guardian.AppImage
To test it works on your system, double click it from a file explorer that can launch executables or launch it from the command line. You should see the GUI window open.
[2] Install mcp-guardian-proxy
Download
mcp-guardian-proxy_x86_64-linux
Rename the binary and make it executible:
mv mcp-guardian-proxy_x86_64-linux mcp-guardian-proxy
chmod +x mcp-guardian-proxy
We recommend you place mcp-guardian-proxy somewhere in your system's PATH so it can be more conveniently used by MCP Guardian, however this is not required.
Test it works on your system:
mcp-guardian-proxy --help
You should see a help message with usage.
[Optional] Install mcp-guardian-cli
The MCP Guardian GUI (mcp-guaridan) and mcp-guardian-proxy are all that need be installed to use MCP Guardian, but mcp-guardian-cli is available for users who would prefer a terminal based workflow to the GUI.
Download
mcp-guardian-cli_x86_64-linux
Rename the binary and make it executible:
mv mcp-guardian-proxy_x86_64-linux mcp-guardian-proxy
chmod +x mcp-guardian-proxy
Test it works on your system:
mcp-guardian-cli --help
You should see a help message with usage.
After Installing
Once you have binaries installed on your system, see the Tutorial to quickly get up and running with MCP Guardian.
Installing - macOS
MCP Guardian consists of two main parts; the proxy and a user interface for configuration. There are two user interfaces provided; a CLI and a desktop gui. The tutorials focus on the desktop gui, but you can do all the same configuration through the included CLI.
Download
Download the latest macOS .dmg package from Github Releases.
Install GUI
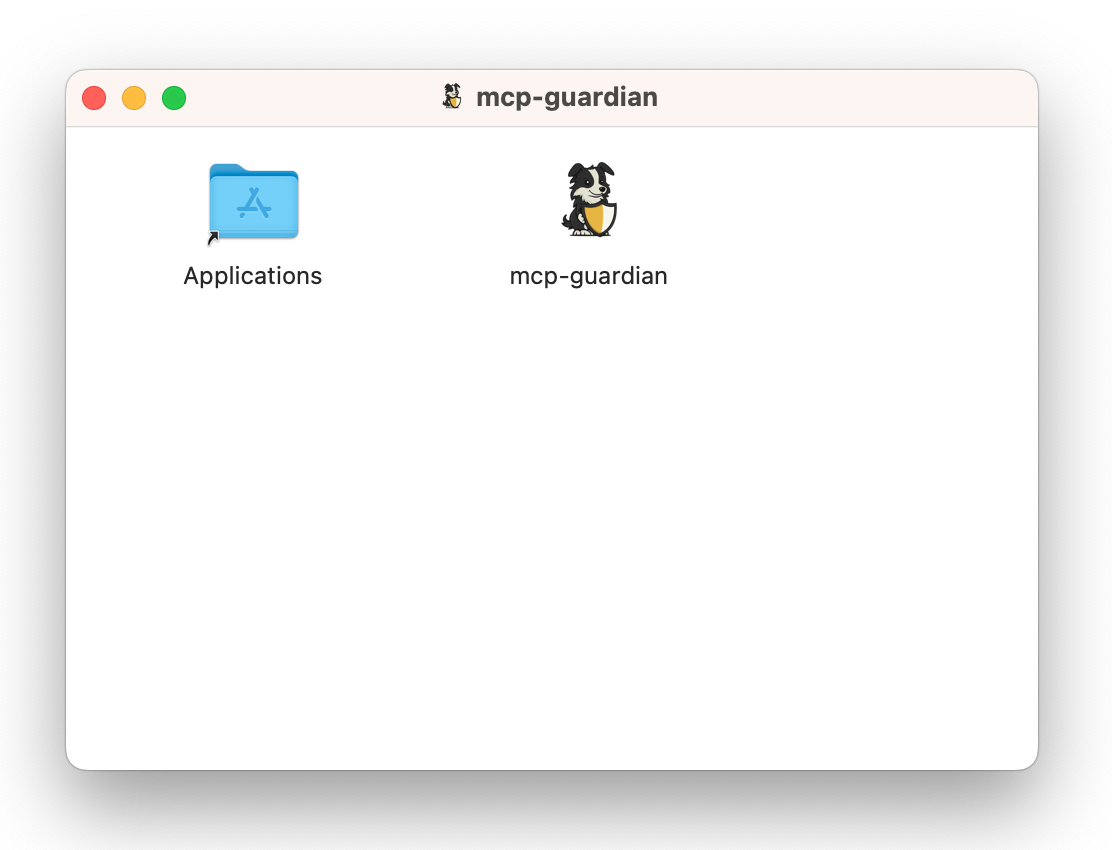
From the finder, double-click the downloaded .dmg file. Then drag the MCP Guardian application into "Applications".
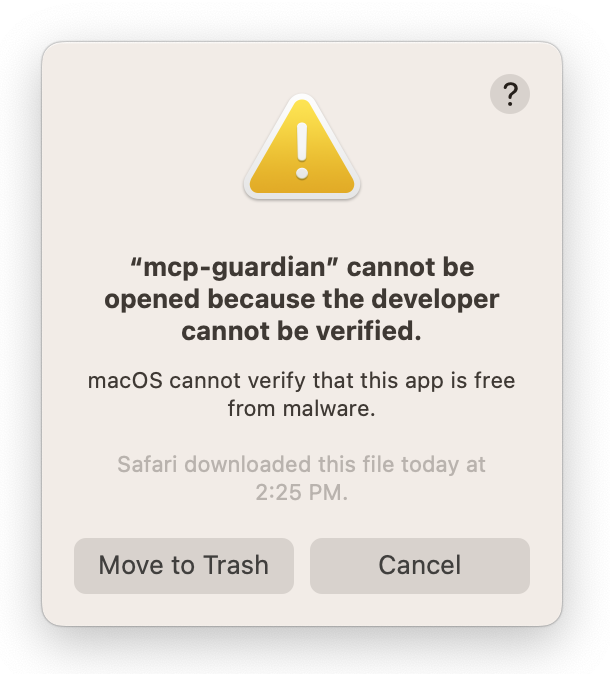
Now, from "Launchpad" try launching MCP Guardian. You should get a message about not being able to open the application because it's not verififed.
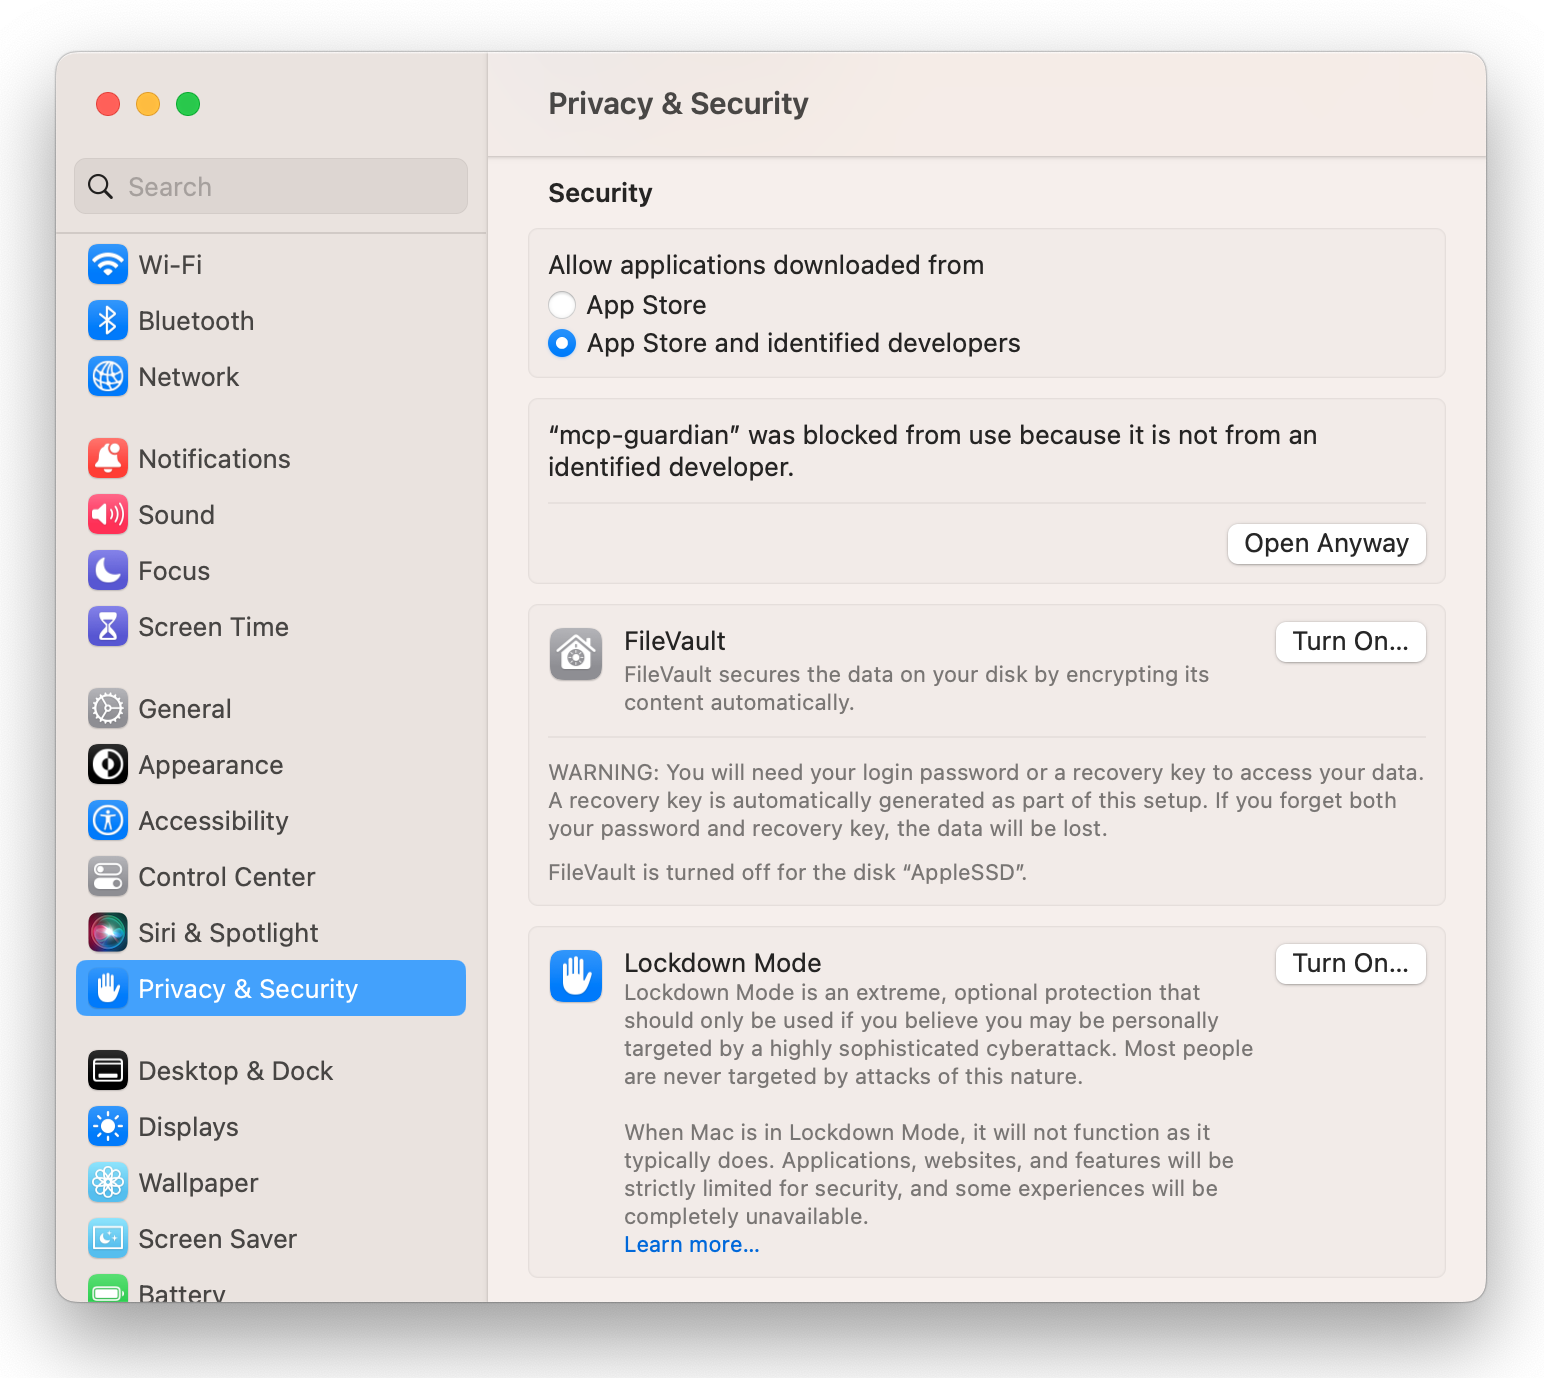
Open 'System Settings' and go to 'Privacy & Security' and scroll down to the 'Security' section. You will see a message saying mcp-guardian was blocked from use. Click "Open Anyway". You may have to enter your password. Then click "Open" to allow the installed MCP Guardian application to run on your machine.
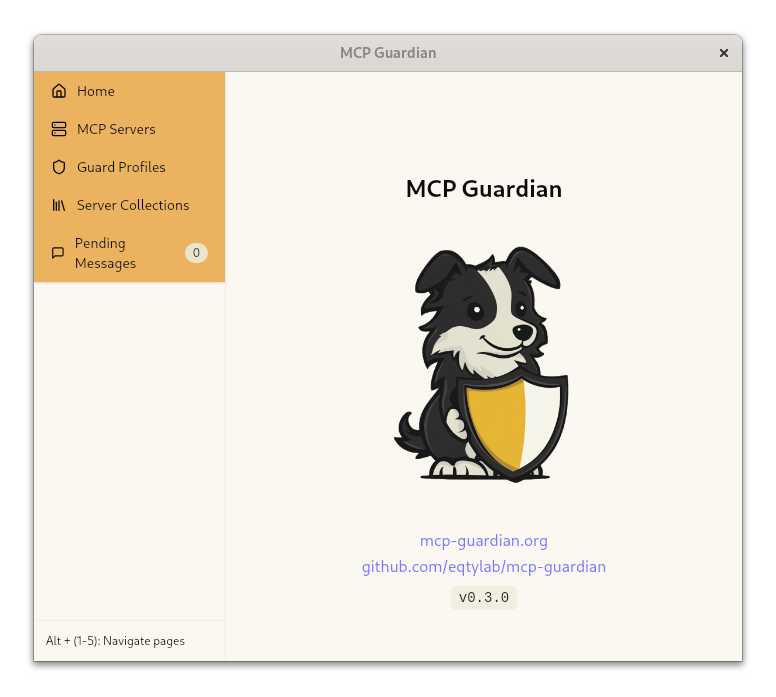
The MCP Guardian GUI application should launch at this point.
Install Proxy + CLI
mcp-guardian-proxy and mcp-guardian-cli binaries are both packaged with the GUI as "Resources" in the application package. In order to use these binaries more easily you'll want to copy them somewhere included in your PATH.
- If it doesn't already exist, create
/usr/local/bin
sudo mkdir /usr/local/bin
- Copy binaries to
/usr/local/bin
sudo cp /Applications/mcp-guardian.app/Contents/Resources/mcp-guardian-proxy /usr/local/bin/
sudo cp /Applications/mcp-guardian.app/Contents/Resources/mcp-guardian-cli /usr/local/bin/
- Make sure binaries are executible
chmod +x /usr/local/bin/mcp-guardian-proxy
chmod +x /usr/local/bin/mcp-guardian-cli
- Try to run
mcp-guardian-proxy
mcp-guardian-proxy --help
- If you get a message about not being able to run
mcp-guardian-proxyinstead of the--helpoutput, follow the same steps as were done for the GUI application to enable the binary from 'System Settings' -> 'Privacy & Security' -> 'Security'. You can also do the same formcp-guardian-cliif you would like to use the cli interface instead of the GUI application for configuring MCP Guardian.
MCP Guardian is now installed. Check out the intro and tutorials to start using MCP Guardian with Claude Desktop.
Installing - Windows
Download
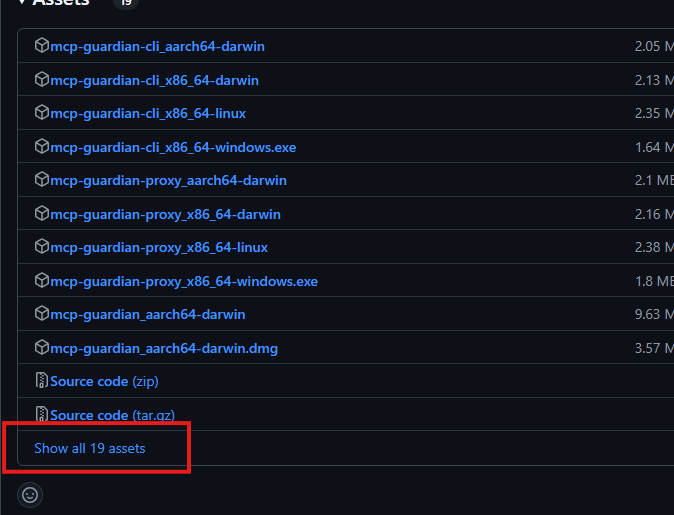
Download the the latest Windows msi installer package from github
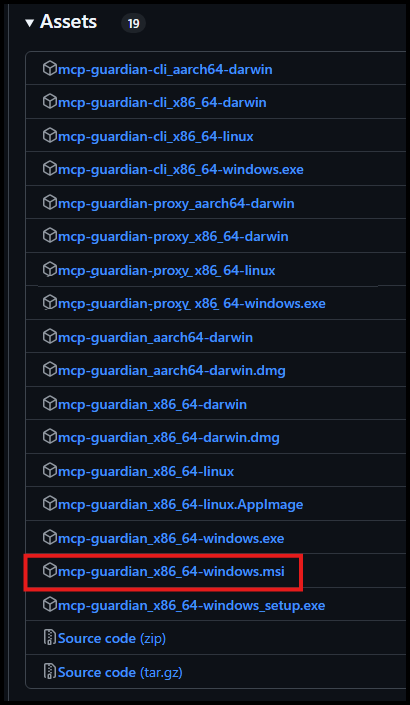
You may need to show all assets to find the installer.
Install
-
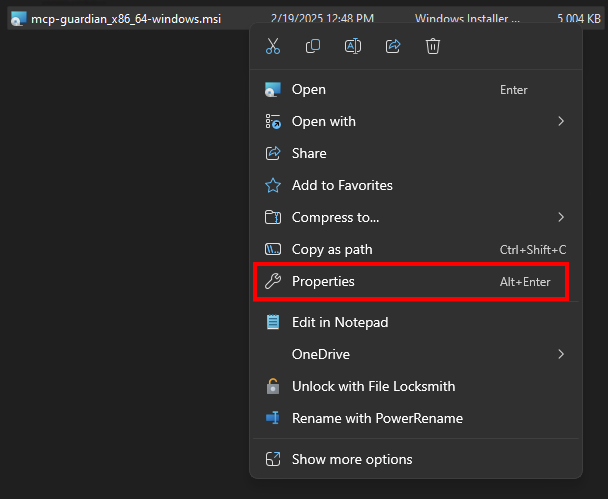
After the download finishes, open the File Explorer and navigate to the download folder.
-
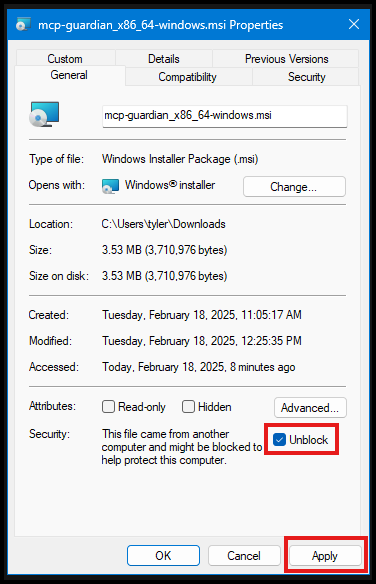
Right click the msi file and select
Properties
-
In the properties window that opens, check the
Unblockcheckbox on the General Tab in the Security section; and then clickApply.
-
Double click the
mcp-guardian_x86_64-windows.msifile to launch the installer.

-
Click the
Nextbutton, accepting all defaults, then clickInstall. You'll get a prompt from the User Account Control asking for permission to make changes to your device; selectYes

-
After the installer completes, click
Finishand the MCP Guardian UI will launch automatically.
Proxy Setup
To make it easier to call the MCP Guardian Proxy, we'll now add the install location to your system path.
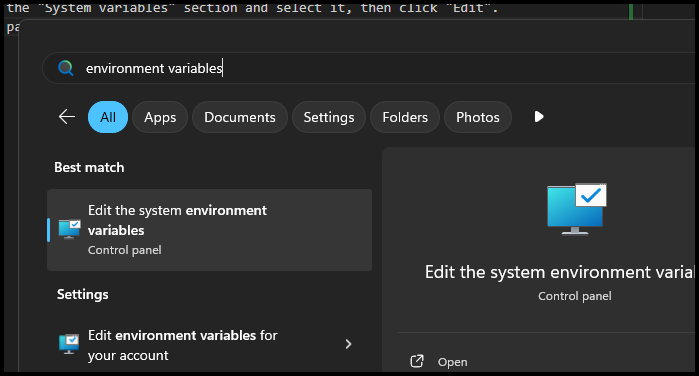
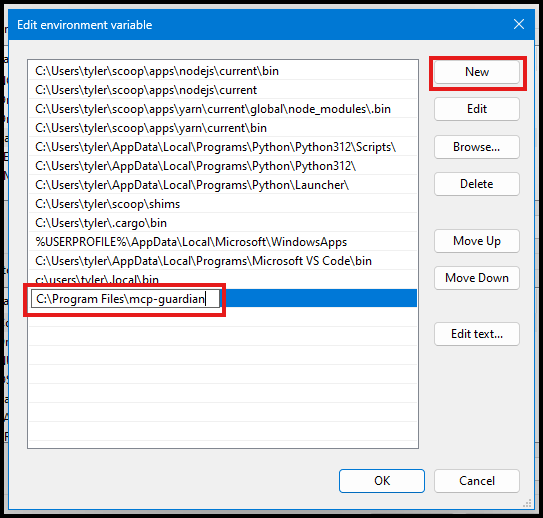
- Open the Start Menu and search for "Environment Variables" and select "Edit the system environment variables".
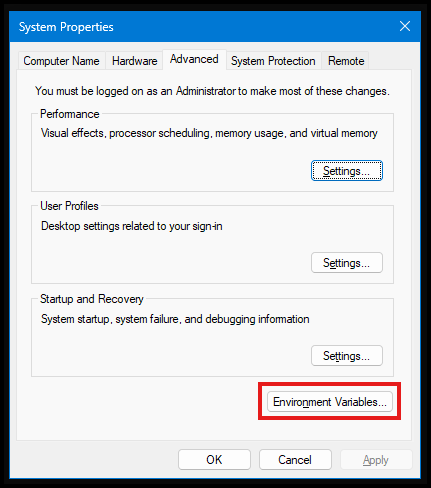
- In the System Properties window, click on the "Environment Variables" button.
- In the Environment Variables window, find the "Path" variable in the "System variables" section and select it, then click "Edit".
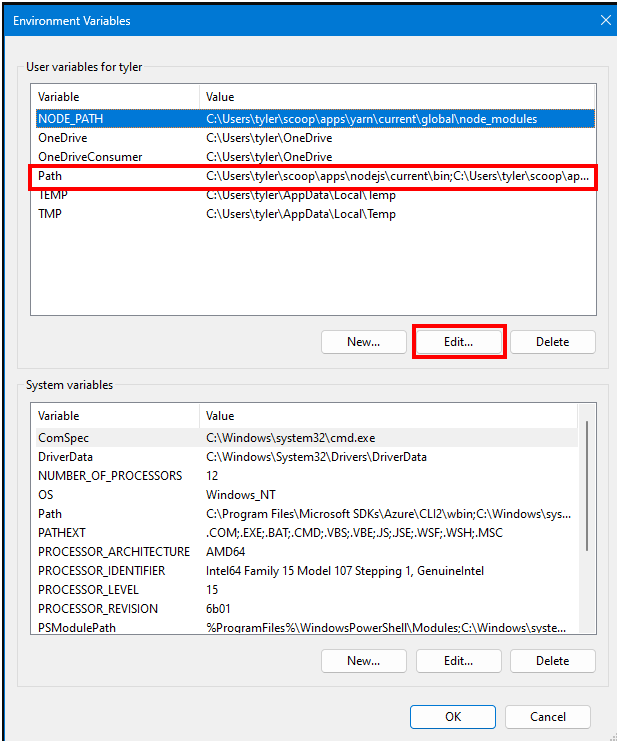
- In the Edit Environment Variable window, click "New" and add
C:\Program Files\mcp-guardian
- Click
ApplyorOkin each of those windows to close them
- Open a PowerShell shell and run
sh mcp-guardian-proxy --helpand you should see output like this:

MCP Guardian is now installed. Check out the intro and tutorials to start using MCP Guardian with Claude Desktop.
Tutorial
The heart of MCP Guardian is the proxy application that allows for monitoring an authorization of communications between the AI agent and MCP servers, but to make configuration and usage of the proxy easier, a CLI and GUI app are provided. The CLI and GUI have the same functionality so you can use whichever one is easier for you.
Make sure you've completed the installation steps for your system, then create an mcp server, and a server collection that can be exported to Claude Desktop.
Create an MCP Server
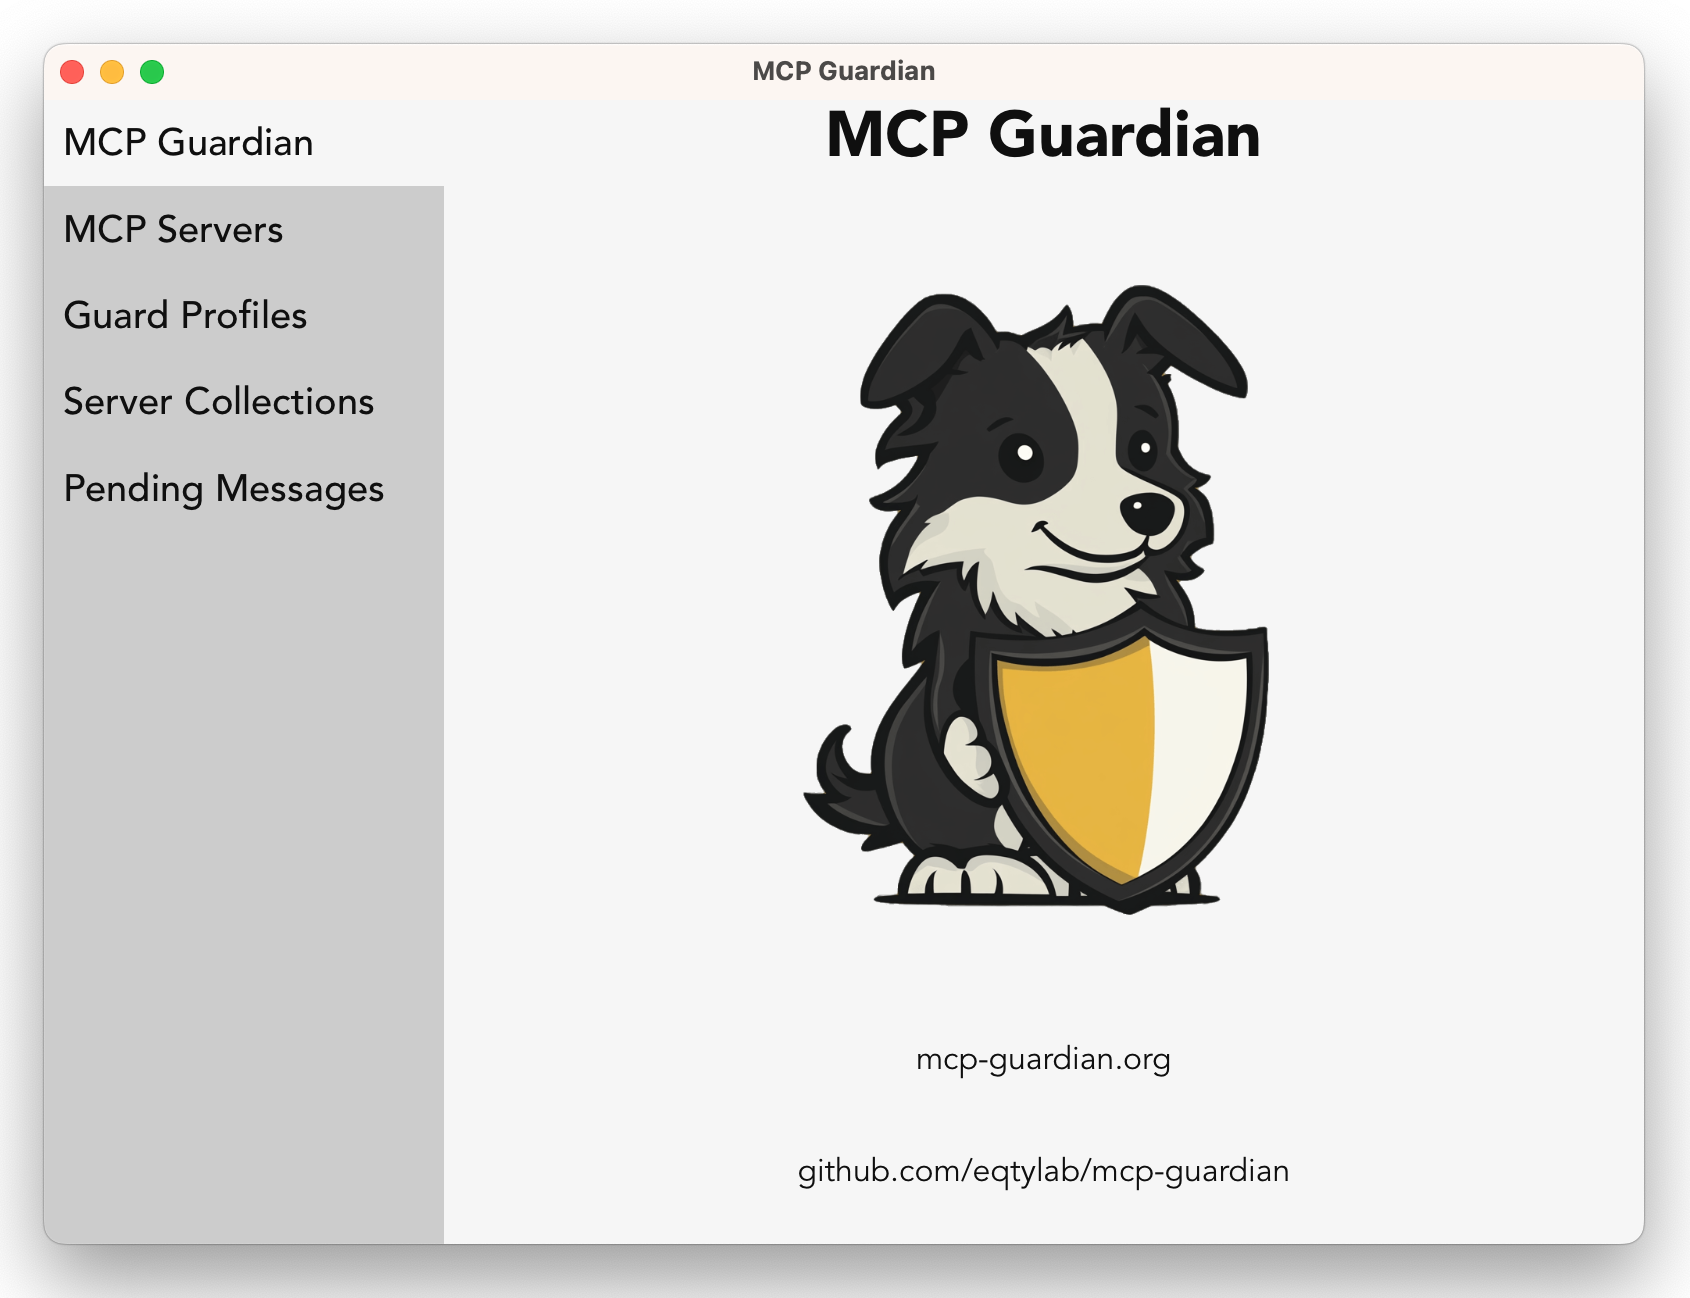
Launch the MCP Guardian UI if it's not already running.
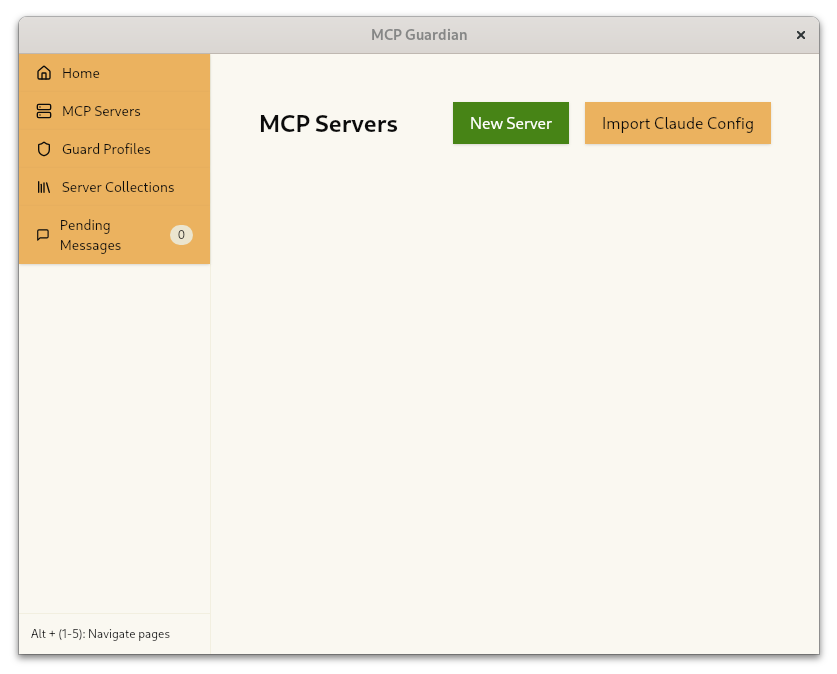
Select the MCP Servers tab, then click the Create New MCP Server button.
The Create MCP Server window has three fields:
- Namespace - This is used for grouping/organizing server configurations. It can be any value you want except
mcp-guardian - Name - The user friendly name to give the server.
- Config - The JSON configuration for launching the MCP server. Dozens of servers are available from https://github.com/modelcontextprotocol/servers
For this tutorial enter the following values:
Namespace - tutorial
Name - time-server
Config -
{
  "cmd": "uvx",
  "args": ["mcp-server-time", "--local-timezone=America/New_York"],
  "env": {}
}
If you don't have uvx installed, docker and pipx configurations are available here
Then click Save
Create Server Collection
A server collection combines the functionality of an MCP server with the protections of a Guard Profile. The collection creates a claude configuration and imports it directly to Claude.
This doc assumes you created the Time server as defined in the create mcp server doc. If you want to use a different server, make sure to use the namespace and name for that server.
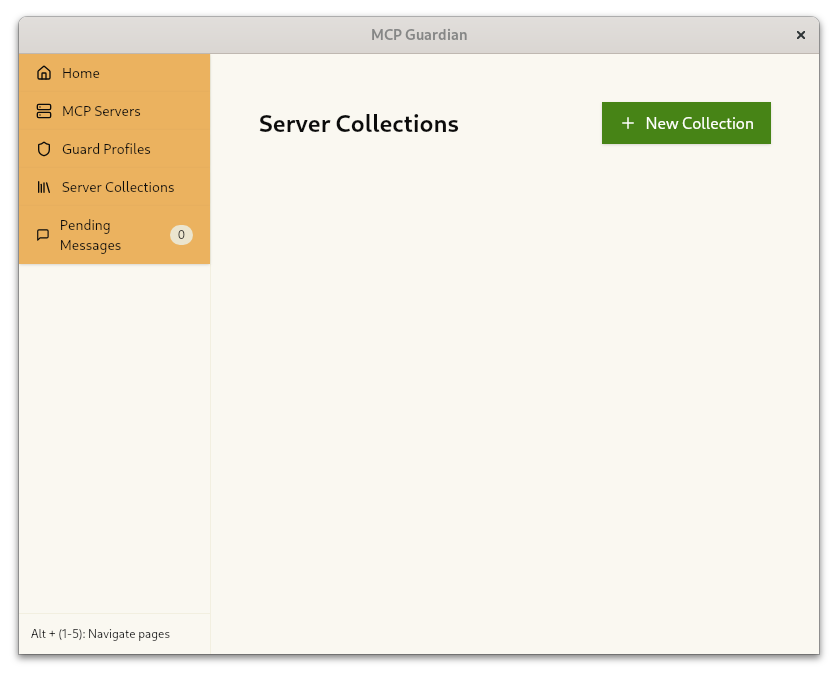
From the Serer Collections tab, click the Create New Server Collection button.
The collection needs a namespace, and name. These can be different from the name and namespace you used for the MCP Server and Guard Profile. For this tutorial we'll use:
- Namespace -
tutorial-collection - Name -
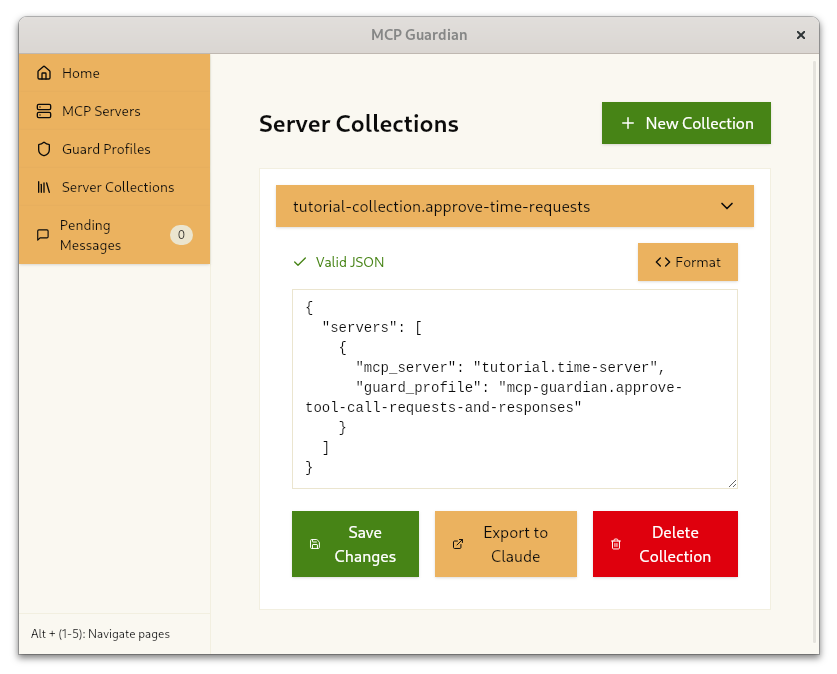
approve-time-requests - Config -
{
  "servers": [
    {
      "mcp_server": "tutorial.time-server",
      "guard_profile": "mcp-guardian.approve-tool-call-requests-and-responses"
    }
  ]
}
The
mcp_serverandguard_profilemust be in the format<NAMESPACE>.<NAME>and must match the server and guard profile you have defined.
Click Create and you'll see your new server collection in the list.
Expand the server collection, and then click the Export to Claude button.
If you didn't add the
mcp-guardian-proxyto your system path, you can specify the fullpath to start the proxy now.
Click the Apply to Claude Desktop then open the Pending Messages tab
If Claude was already running, you'll need to exit and restart it for the configuration to take affect.
After Claude restarts, make sure the MCP Guardian UI is visble along side Claude, then ask Claude If its 6 pm in New York, what time is it in Los Angeles?.
Claude will begin to process your prompt, then attempt to communicate with the mcp-server-time through the MCP Guardian Proxy. Claude's communication with the server is visible in the Pending Messages, along with the server function it is trying to call and the data it wants to pass to the server. This gives you the opportunity to inspect the data and stop it from being sent to the server.
Similarly, the servers response is visible in the GUI and again, you can prevent the data from being sent back to Claude if you choose.
If a pending message isn't approved soon enough, Claude will eventually time out and the prompt will fail.

Rust Crates
mcp-guardian-core
mcp-guardian-core is a library crate holding most of the core application logic for MCP Guardian. It's consumed by mcp-guardian, mcp-guardian-cli, and mcp-guardian-proxy.
mcp-guardian
mcp-guardian is a GUI application and is the primary user interface for MCP Guardian. It's built with Rust and React using Tauri.
mcp-guardian-proxy
mcp-guardian-proxy is a CLI tool for running MCP proxy servers managed by MCP Guardian. This binary should be installed in PATH on your system so it can be launched by MCP hosts you want to control with MCP Guardian.
mcp-guardian-cli
mcp-guardian-cli is a CLI application and is meant to provide all the same functionality as the GUI application for users preferring a terminal-based workflows.